Introduction
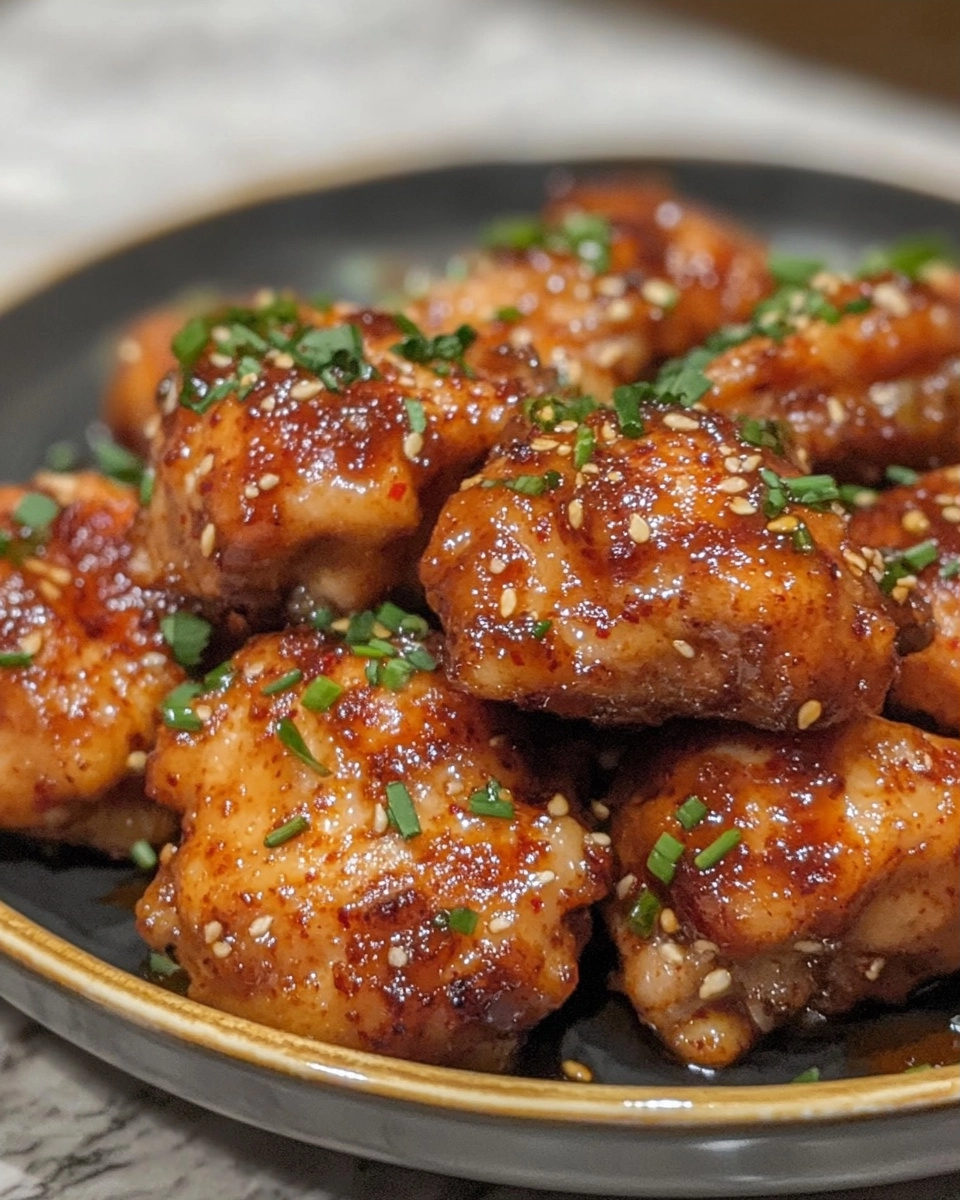
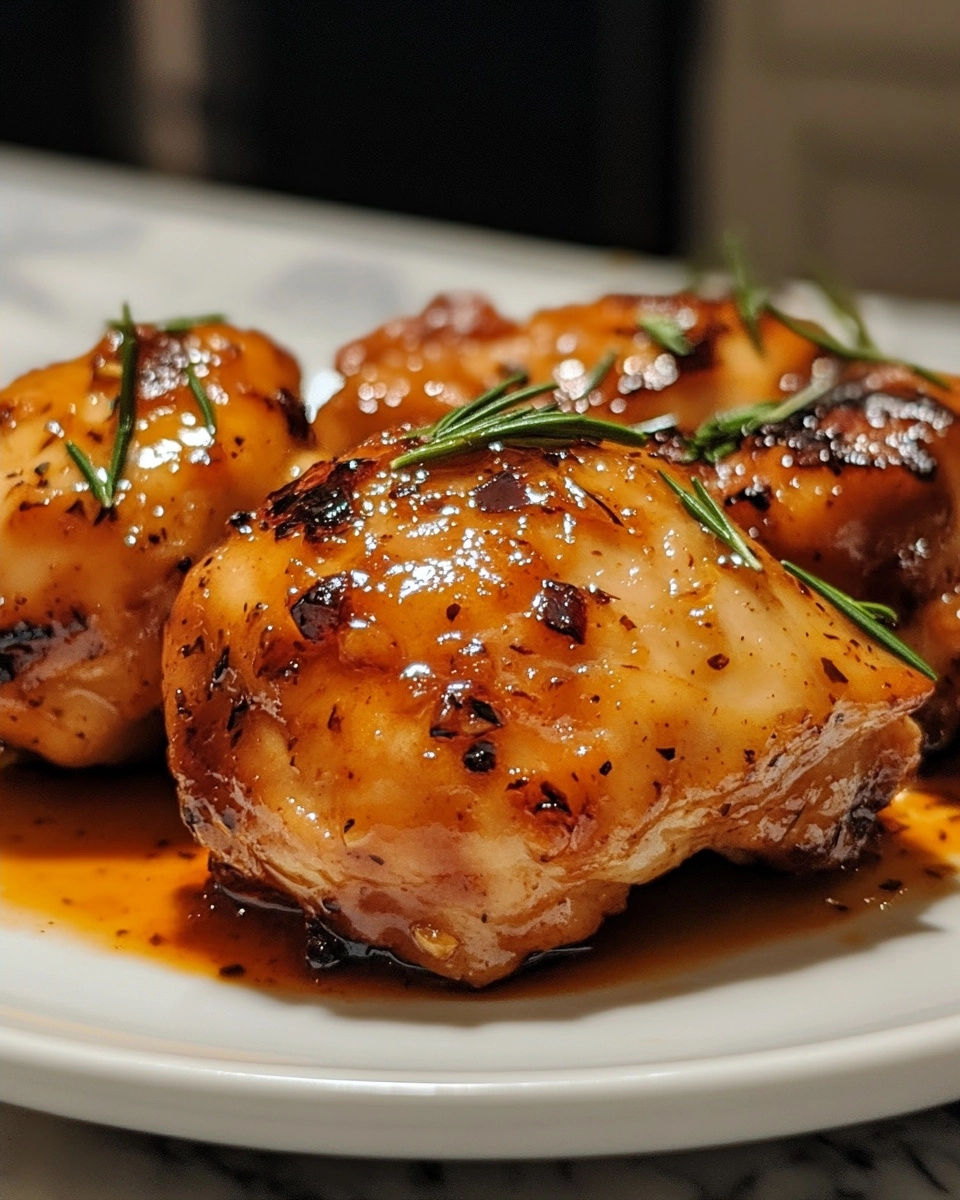
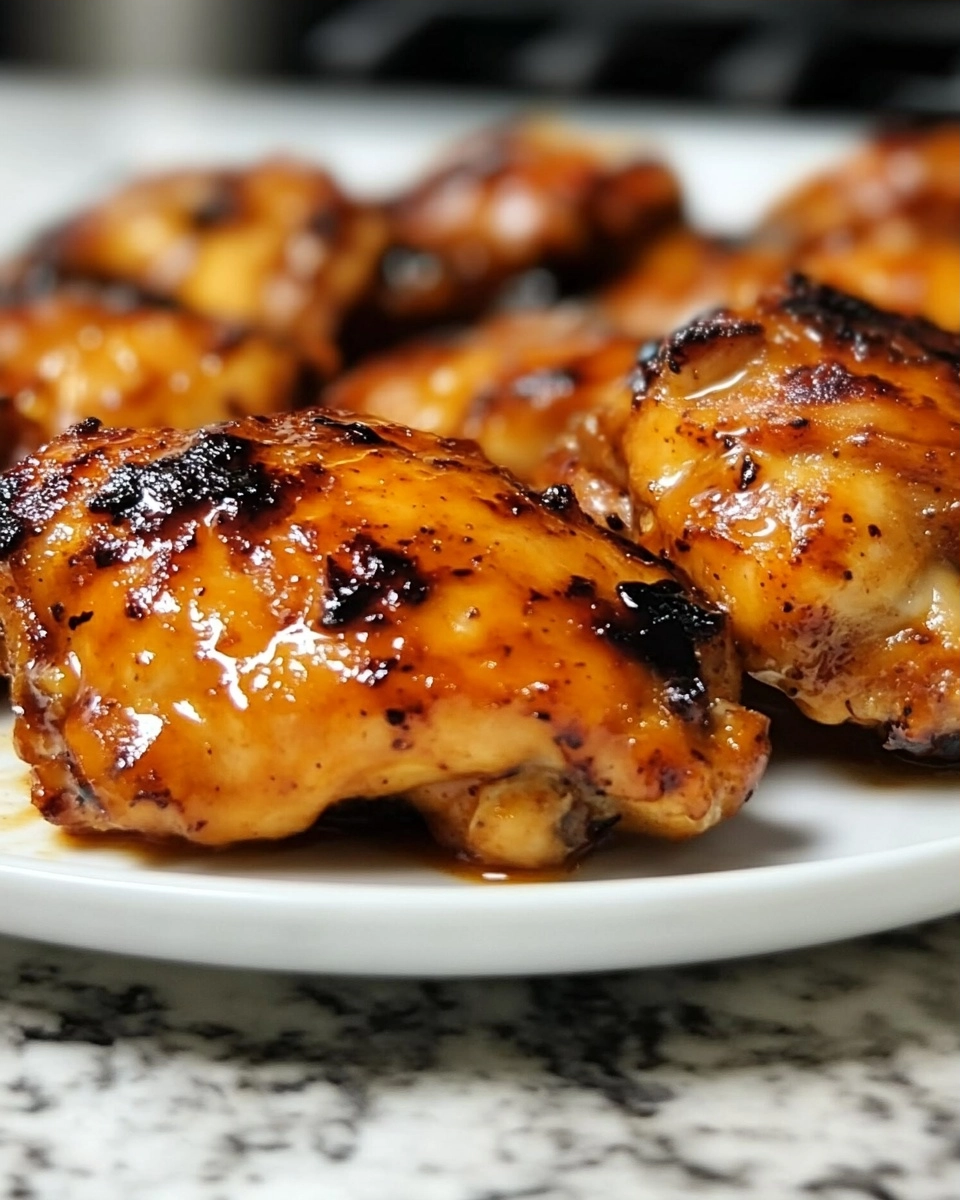
Do you ever crave that perfect balance of sweet and savory from your favorite takeout spot, but wish you could make it at home? I get it. The best Thai food often feels like a well-kept secret. That’s exactly why I fell in love with these homemade sweet chili chicken thighs. Imagine succulent, juicy chicken coated in a glossy, sticky sauce that pairs the gentle heat of chili with a delightful sweetness. It’s easier to make than you think, and it will quickly become your new favorite dinner.
Why You’ll Love This Sweet Chili Chicken Thighs Recipe
This sweet and spicy sticky chicken is everything you want in a weeknight meal. Let me tell you exactly why this recipe is a winner.
Quick & Easy to Make
With simple steps and minimal prep, you’ll have dinner on the table in under 45 minutes. No complicated techniques required!
Packed with Flavor
Each bite delivers a perfect combination of sweet, spicy, tangy, and savory notes that will have you licking the sauce off your fingers.
Perfect for Any Occasion
Need a quick family dinner, a meal prep superstar, or an impressive dish for guests? This sticky chili chicken is your versatile answer.
Budget-Friendly & Family-Friendly
Chicken thighs are economical and hard to overcook. The sweet heat is also mild enough to please even picky eaters at your table.
What Is Sweet Chili Chicken Thighs?
Before we get cooking, let’s explore exactly what this dish is all about—it’s more than just a delicious dinner.
Where It Comes From
This dish is inspired by the sweet chili sauces popular in Thai cuisine, where a blend of sugar, vinegar, and chili creates a vibrant dipping sauce. We’re transforming it into a mouthwatering coating for juicy chicken thighs.
What Makes It Unique
Unlike a simple barbecue sauce, this glaze is brighter and more complex. The vinegar adds a tangy punch that cuts through the deep sweetness, while the chili provides a gentle, warming heat.
When to Serve It
It’s ideal for a relaxed weekend dinner, a speedy weeknight fix, or even as the star of your next potluck. It’s a surefire crowd-pleaser.
Ingredients You’ll Need
This recipe uses a mix of pantry staples and fresh ingredients to build incredible flavor.
Main Ingredients
You’ll need about 2 pounds of bone-in, skin-on chicken thighs for the best juicy results. The skin crisps up beautifully, but you can use boneless, skinless thighs for a leaner option. For searing, use a neutral oil with a high smoke point, like avocado oil or vegetable oil. Garlic and a small red chili (or red pepper flakes) provide the aromatic base.
Sauce & Seasonings
The sauce is pure magic: sweet chili sauce is the star. Complement it with soy sauce for saltiness and umami depth (use tamari for gluten-free), rice vinegar for acidity, honey for natural sweetness, and ginger for a warm, spicy note. A touch of cornstarch slurry helps thicken the sauce into a perfect glaze.
Optional Add-Ons & Toppings
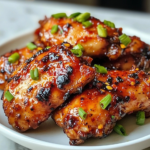
For garnish and extra flavor, add sliced green onions, toasted sesame seeds, or fresh cilantro. A squeeze of fresh lime juice just before serving brightens the entire dish.
How to Make Sweet Chili Chicken Thighs (Step-by-Step)
Step 1 – Prep Ingredients
Pat your chicken thighs completely dry with paper towels—this is key for crispy skin. Season generously all over with salt and freshly ground black pepper. Then, whisk together all the sauce ingredients (sweet chili sauce, soy sauce, vinegar, honey, grated ginger) in a small bowl.
Step 2 – Cook / Combine
Heat oil in a large skillet or oven-safe pan over medium-high heat. Once hot, place the chicken thighs in the pan, skin-side down. Cook for 6-8 minutes without moving them to get that skin golden brown and crispy.
Step 3 – Main Cooking Process
Flip the chicken thighs. Pour the prepared sweet and spicy sauce around them (not directly on top yet to keep the skin crisp). Add some minced garlic to the sauce. Let the sauce simmer for a minute, then spoon some over the chicken. Transfer the entire pan to a preheated 375°F (190°C) oven for 15-20 minutes, or until the chicken is cooked through.
Step 4 – Final Touches
Carefully remove the pan from the oven. Transfer the chicken to a plate. Place the pan with the remaining sauce back on the stovetop. Stir in a cornstarch slurry (1 tsp cornstarch mixed with 1 tbsp water) and simmer for 1-2 minutes until the sauce thickens beautifully into a sticky glaze.
Pro Tips for the Best Sweet Chili Chicken
Flavor Tips
For maximum flavor, let the chicken marinate in half the sauce for 30 minutes before cooking. Always use fresh garlic and ginger for the brightest taste.
Texture Tips
DO NOT overcrowd the pan when searing. Work in batches if needed. Patting the chicken dry ensures the skin gets ultra-crispy instead of steaming.
Common Mistakes to Avoid
Avoid moving the chicken during the initial sear. Don’t skip reducing the sauce at the end—this concentrates the flavor and creates the signature sticky coating.
Variations & Substitutions
Dietary Options
Make it gluten-free by using tamari instead of soy sauce. For a refined sugar-free version, replace the sweet chili sauce with a sugar-free alternative and use more honey.
Ingredient Swaps
No rice vinegar? Apple cider vinegar works. Maple syrup or brown sugar can stand in for honey. Use chicken breasts if you prefer, but reduce cooking time to avoid dryness.
Flavor Variations
Add a tablespoon of peanut butter to the sauce for a Thai-inspired twist. For extra heat, add a diced jalapeño or a sprinkle of crushed red pepper flakes while cooking.
Serving Suggestions
Best Side Dishes
Serve over a bed of fluffy white rice or coconut rice to soak up the delicious sauce. Steamed jasmine rice is a classic choice.
Garnishes & Toppings
Top with sliced green onions, a sprinkle of white or black sesame seeds, and fresh cilantro for color and freshness.
Drink Pairings
A crisp, dry white wine like Sauvignon Blanc or a sparkling water with lime perfectly complements the sweet and spicy flavors.
Storage & Reheating Tips
How to Store in the Fridge
Store leftovers in an airtight container in the refrigerator for 3-4 days, with the sauce and chicken kept together.
Can You Freeze It?
Yes! Freeze cooked, cooled chicken and sauce in a freezer-safe container for up to 2 months. Thaw overnight in the fridge before reheating.
How to Reheat Properly
Reheat gently in a covered skillet over low heat with a splash of water, or in the microwave at 50% power to prevent the sauce from separating.
Frequently Asked Questions (FAQ)
Q: Can I make this with chicken breasts instead?
A: Yes, but use boneless, skinless breasts and reduce the oven cooking time by 5-7 minutes to keep them moist.
Q: Is this dish very spicy?
A: It has a mild, warming heat. You can control the spice level by adjusting the amount of fresh chili or using a mild sweet chili sauce.
Q: What’s the best way to get a really sticky sauce?
A: The key is the final simmer with a cornstarch slurry. Let it bubble until it thickly coats the back of a spoon.
Q: How can I tell when the chicken is fully cooked?
A: The chicken is done when an instant-read thermometer inserted into the thickest part reads 165°F (74°C).
Homemade Sweet Chili Chicken Thighs – Better Than Takeout
- Total Time: 45
- Yield: 4 servings (2 thighs per serving) 1x
Description
Succulent chicken thighs coated in a glossy, sweet chili glaze with a perfect balance of sweet, spicy, and tangy flavors. Ready in 45 minutes, this Thai-inspired dish is quick, budget-friendly, and irresistibly crave-worthy.
Ingredients
2 pounds bone-in, skin-on chicken thighs
Avocado oil or vegetable oil for searing
2 garlic cloves, minced
1–2 red chilies (or 1 teaspoon red pepper flakes)
1 1/2 cups sweet chili sauce
1/4 cup honey or brown sugar
2 tablespoons rice vinegar
1 tablespoon soy sauce
1 teaspoon cornstarch mixed with 2 tablespoons water (for thickening)
Instructions
Preheat oven to 375°F (190°C). Pat chicken dry and season with salt
Heat oil in a skillet; sear chicken skin-side down until golden (10-12 mins), flip and cook 2-3 mins
Transfer to oven; roast 20-25 mins until chicken is cooked through
Meanwhile, sauté garlic and chili in oil; add sweet chili sauce, honey, vinegar, and soy sauce
Simmer 5-7 mins until slightly thickened; stir in cornstarch slurry
Finish chicken with sauce, then broil 2-3 mins to glaze
Notes
Use bone-in thighs for juiciness; skin is optional
Substitute chili flakes for fresh chilies if desired
Glaze will keep 5 days frozen (2-3 months)
Serves excellently with jasmine rice or grilled veggies
- Prep Time: 15
- Cook Time: 30
- Category: Chicken
- Method: Oven Roasting
- Cuisine: Thai-Inspired
Nutrition
- Serving Size: 2 chicken thighs
- Calories: 380
- Sugar: 20g
- Sodium: 800mg
- Fat: 16g
- Saturated Fat: 4g
- Carbohydrates: 24g
- Fiber: 0.5g
- Protein: 45g
- Cholesterol: 130mg